
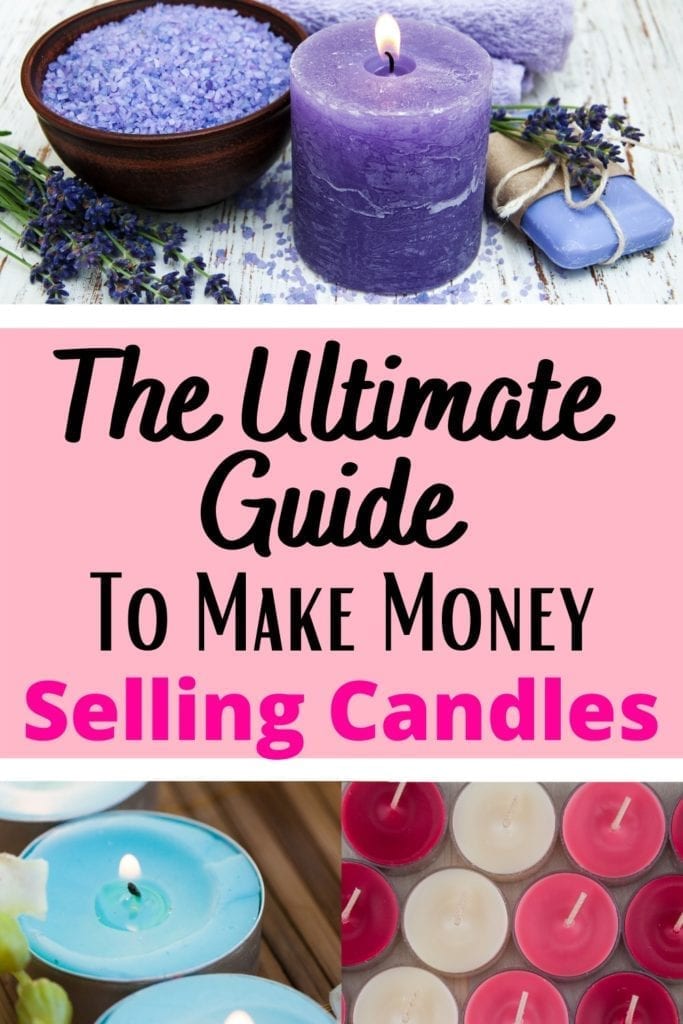
There is no time like the present for crafters to kick their skills into high gear! Selling any craft can be profitable, but none hold a candle to…well…candles. (A little humor.) Anyway, candles are a billion-dollar industry. 2.3 billion, to be exact. If you are interested in getting your share of the money or know someone who is, be sure to check out this ultimate guide to making money selling candles!
*As an Amazon Associate, this post contains links for which I may be compensated a small amount at no extra cost to you should you choose to click and purchase something through them.
Table of Contents
First Learn How To Make Candles
Making candles is the obvious first step to earning money by selling them. There are so many types of candles to make! To get started, you should pick a style you are interested in.
Here are a few examples of the types of candles you could make!
- Fragranced
- Essential Oil
- Votives
- Gel
- Soy
- Paraffin
- Combination Wax
How To Make Candles Inexpensively At Home
Delve into the art of candle making with this budget-friendly DIY guide. Creating your own candles not only saves money but also allows for customization and creativity. Follow these simple steps to craft beautiful candles from the comfort of your home.
Gather Materials
Collect your supplies to begin your candle-making journey. You’ll need wax (paraffin, soy, or beeswax), wicks, containers (jars, tins, or molds), fragrance oils or essential oils (optional), dye chips or crayons (optional for color), a double boiler or makeshift setup, a thermometer, and a stirring utensil.
Prepare Your Workspace
Set up a clean and spacious area for candle making. Cover surfaces with newspaper or wax paper to catch any spills. Ensure good ventilation for safety.
Melt the Wax
Use a double boiler or create one by placing a heat-proof container in a pot of simmering water. Melt the wax slowly, stirring occasionally, until completely liquid. Monitor the temperature with a thermometer, aiming for around 170-180°F (77-82°C).
Prepare the Containers
While the wax is melting, prepare your containers by securing wicks in the center. You can use wick stickers or hot glue to hold them in place. Ensure the wicks are straight and centered.
Add Fragrance and Color (Optional)
If desired, add fragrance oils or essential oils to the melted wax for scent. Use dye chips or crayons to add color, adjusting the intensity to your preference. Stir gently to evenly distribute. Many people these days are opting to use the minimalist look of basic white natural candles. This will remove the need for colorant costs.
Pour the Wax Carefully
Pour the melted wax into your prepared containers, ensuring the wick remains centered. Leave some space at the top to prevent overflow. Use a pencil or chopstick to adjust the wick if needed.
Let the Candles Set
Allow the candles to cool and set completely, typically for several hours or overnight. Avoid moving or disturbing them during this time to prevent uneven cooling.
Trim the Wicks
Once the candles have fully set, trim the wicks to about 1/4 inch (0.6 cm) above the wax surface. This helps ensure a clean and even burn when you light the candles.
Choosing Quality Fragrances
The foundation of a well-scented candle begins with high-quality fragrance oils or essential oils. Opt for reputable suppliers that offer a wide range of scents specifically formulated for candle making. These oils are designed to disperse evenly throughout the wax, ensuring a consistent and long-lasting fragrance experience.
Proper Scent Concentration
Finding the right balance of fragrance concentration is crucial for a well-scented candle. While it’s tempting to add more fragrance oil for a stronger scent, overdoing it can lead to issues like poor burn performance or overwhelming fragrance. Follow recommended guidelines for fragrance load percentages based on the type of wax you’re using, and experiment cautiously to achieve the desired scent intensity.
Layering Fragrances
For complex and nuanced scents, consider layering multiple fragrance oils to create unique blends. Experiment with complementary scents like floral and citrus or woody and herbal to develop captivating aroma profiles. By layering fragrances strategically, you can create candles with depth and complexity that appeal to a wider range of preferences.
Curing Time
Allow your scented candles to cure for an adequate period to maximize fragrance throw. Curing involves letting the candles rest after pouring to allow the fragrance to fully develop and meld with the wax. Typically, candles benefit from curing for at least 1-2 weeks, although some scents may require longer. Patience during this process results in candles with richer, more well-rounded fragrances.
Testing and Adjusting
Lastly, don’t underestimate the importance of testing and adjusting your candle scents. Conduct thorough scent tests throughout the candle-making process, from initial fragrance selection to final product evaluation. Pay attention to factors like scent strength, throw, and longevity, and be willing to make adjustments as needed to achieve the perfect balance of fragrance in your candles.
How To Make Custom Candle Molds
To create your own candle molds, you have several options depending on your preferences and the type of candles you want to make. One common method involves using silicone molds, which are flexible, durable, and easy to work with.
Start by selecting a silicone mold in the desired shape and size for your candles. You can find a variety of silicone molds online or in craft stores, ranging from simple shapes like cylinders and spheres to more intricate designs.
Once you have your silicone mold, prepare it for pouring by ensuring it’s clean and free of any debris. If necessary, you can also apply a mold release agent to help the candles release more easily once they’ve hardened.
Next, heat your candle wax to the appropriate temperature according to the type of wax you’re using. Carefully pour the melted wax into the silicone mold, taking care to avoid overfilling. If you’re adding fragrance or color to your candles, mix these ingredients into the wax before pouring for even distribution.
After pouring the wax into the mold, allow it to cool and harden completely. This process may take several hours or overnight, depending on the size and thickness of your candles. Once the candles have hardened, carefully remove them from the mold by gently flexing the silicone to release them.
Your homemade candle molds can be reused multiple times, allowing you to create custom candles in various shapes and sizes to suit your preferences. With a bit of creativity and experimentation, making your own candle molds can be a fun and rewarding way to customize your candle-making projects.
Starting A Candle Making Business
Starting a candle-making business can be an exciting venture, but it requires the right approach. Begin by researching the market to understand trends, customer preferences, and potential competition. Identify your niche, whether it’s eco-friendly candles, luxury scents, or unique designs, to differentiate your brand and target audience effectively.
Next, gather your supplies and equipment, including wax, wicks, fragrance oils, containers, and packaging materials. Consider purchasing wholesale or in bulk to reduce costs and maximize profits. Set up a dedicated workspace with proper ventilation and safety measures to ensure a smooth and efficient production process.
Develop your product line with a variety of candle types, sizes, scents, and designs to appeal to a broader customer base. Experiment with combinations to create signature blends or themed collections that reflect your brand’s aesthetic and values. Invest in high-quality ingredients and packaging to enhance the perceived value of your candles.
Create a strong brand identity with a memorable name, logo, and packaging that reflects your brand’s story and values. Build an online presence through a professional website and active social media presence to showcase your products, engage with customers, and drive sales. Consider selling your candles through online marketplaces, local craft fairs, or pop-up shops to reach a wider audience and generate buzz for your brand.
Finally, focus on marketing and promotion to attract customers and grow your business. Utilize social media marketing, email newsletters, influencer collaborations, and partnerships with local businesses to increase visibility and drive sales. Offer promotions, discounts, and loyalty programs to incentivize repeat purchases and build customer loyalty. With dedication, creativity, and strategic planning, you can start and grow a successful candle-making business that delights customers and generates sustainable revenue.
Candle Making Supplies – Wholesalers
Sourcing candle-making supplies from wholesalers can be a cost-effective way to obtain quality materials for your business. Begin by researching reputable wholesalers that specialize in candle-making supplies. Look for suppliers that offer a wide range of products, competitive pricing, and favorable terms for bulk purchases.
Once you’ve identified potential wholesalers, reach out to them to inquire about their product offerings, pricing, and minimum order requirements. Ask for samples or catalogs to evaluate the quality of their products before committing. Negotiate pricing and terms to ensure a mutually beneficial partnership.
Place your orders with the wholesalers, keeping in mind factors like lead times, shipping costs, and payment terms. Consider stocking up on essential supplies like wax, wicks, fragrance oils, and containers to minimize production disruptions and take advantage of volume discounts.
Regularly review your supplier relationships to ensure they continue to meet your business needs. Stay informed about industry trends and new product developments to identify opportunities for expanding your product line and improving your offerings. By sourcing candle-making supplies from wholesalers strategically, you can streamline your production process and maximize your business’s profitability.
Supplies Needed for Candle Making
- Wax (paraffin, soy, or beeswax)
- Wicks
- Containers (jars, tins, or molds)
- Fragrance oils or essential oils (optional)
- Dye chips or crayons (optional for color)
- Double boiler or makeshift setup
- Thermometer
- Stirring utensil
- Clean workspace with newspaper or wax paper
Step-by-Step Instructions for Candle Making
Step 1: Prepare Your Workspace
- Set up a clean and spacious area for candle making.
- Cover surfaces with newspaper or wax paper to catch any spills.
- Ensure good ventilation for safety.
Step 2: Melt the Wax
- Use a double boiler or create one by placing a heat-proof container in a pot of simmering water.
- Melt the wax slowly, stirring occasionally, until completely liquid.
- Monitor the temperature with a thermometer, aiming for around 170-180°F (77-82°C).
Step 3: Prepare the Containers
- While the wax is melting, prepare your containers by securing wicks in the center.
- Use wick stickers or hot glue to hold them in place.
- Ensure the wicks are straight and centered.
Step 4: Add Fragrance and Color
- If desired, add fragrance oils or essential oils to the melted wax for scent.
- Use dye chips or crayons to add color, adjusting the intensity to your preference.
- Stir gently to evenly distribute.
Step 5: Pour the Wax Carefully
- Pour the melted wax into your prepared containers, ensuring the wick remains centered.
- Leave some space at the top to prevent overflow.
- Use a pencil or chopstick to adjust the wick if needed.
Step 6: Let the Candles Set
- Allow the candles to cool and set completely, typically for several hours or overnight.
- Avoid moving or disturbing them during this time to prevent uneven cooling.
Step 7: Trim the Wicks
- Once the candles have fully set, trim the wicks to about 1/4 inch (0.6 cm) above the wax surface.
- This helps ensure a clean and even burn when you light the candles.
Selling Candles In Craft Fairs
Selling candles at craft fairs can be a rewarding way to showcase your products and connect with customers. Start by researching craft fairs in your area and selecting events that attract your target audience. Look for fairs with a good reputation, high attendance, and a focus on handmade goods.
Once you’ve chosen your craft fairs, register as a vendor and secure your booth space early to ensure prime placement. Consider investing in a visually appealing display with banners, signage, and attractive packaging to attract shoppers’ attention and make your candles stand out.
Prepare your inventory in advance, stocking up on a variety of candle sizes, scents, and designs to appeal to different tastes and preferences. Price your candles competitively, taking into account your production costs, fair fees, and desired profit margins.
During the craft fair, engage with customers by offering samples, demonstrating candle-making techniques, and sharing information about your brand and products. Be friendly, approachable, and enthusiastic about your candles to create a positive shopping experience and encourage sales.
With careful planning and execution, selling candles at craft fairs can be a lucrative and enjoyable way to grow your business.
How To Make Hand-Dipped Incense Sticks & Cones
Making hand-dipped incense and cones is a delightful and aromatic craft that allows you to create custom scents tailored to your preferences. Start by gathering your materials, including unscented incense sticks or cones, fragrance oils or essential oils, dipping solution (typically a blend of water and alcohol), and a container for mixing.
To make hand-dipped incense sticks, begin by mixing your chosen fragrance oil or essential oil with the dipping solution in a shallow container. The ratio of fragrance oil to dipping solution may vary depending on the strength of the scent you desire, so experiment with different ratios to achieve your desired intensity.
Once your dipping solution is prepared, carefully dip each incense stick into the mixture, ensuring that the entire stick is coated evenly. Allow the excess solution to drip off before placing the dipped sticks on a drying rack or parchment paper to air dry completely. Depending on the humidity and temperature of your environment, drying times may vary, so be patient and allow the sticks to dry thoroughly before packaging.
The process for hand-dipped incense cones is similar but requires a mold to shape them. Mix your fragrance oil or essential oil with the dipping solution as before, then carefully dip the cone-shaped molds into the mixture. Allow the excess solution to drip off before placing the dipped molds on a drying rack or parchment paper to dry completely. Once dry, carefully remove the cones from the molds and allow them to cure for a few days before packaging.
With practice and experimentation, you can create an array of beautifully scented hand-dipped incense sticks and cones to enjoy in your home or share with others. Adjust the scent intensity and experiment with different fragrance combinations to create unique blends that evoke your favorite memories and atmospheres.
How To Make Soap – An Additional Source of Revenue
An additional source of revenue could be melt-and-pour soap making. It’s very straightforward and a nice compliment to a candle-making business.
First, prepare your workspace by covering surfaces with newspaper or parchment paper to protect against spills. Cut the soap base into small, uniform pieces to ensure even melting. Place the soap base in a heat-safe container and melt it in the microwave or over a double boiler, stirring occasionally until completely melted.
Once the soap base is melted, remove it from the heat source and cool slightly before adding fragrance, essential oils, and colorants, if desired. Stir gently to distribute the additives evenly throughout the soap base. Be cautious not to over-stir, as the soap can create air bubbles.
Pour the melted soap base into soap molds, gently tapping the molds on the counter to release air bubbles. Allow the soap to cool and harden completely, typically for several hours or overnight. Once hardened, carefully remove the soap from the molds and allow it to cure for a few days before using or packaging.
With a few simple steps, you can create beautifully crafted homemade soap bars that are gentle on the skin and perfect for gift-giving or personal use.
Click Here To Go Get Candle Making Supplies And More From Amazon
I hope you liked this ultimate candle making guide!
But if you are looking for a simple candle-making tutorial, I have a few to share with you today. Candle making is one of my favorite craft hobbies if you can’t tell by my enthusiasm. I just remember how excited I was to get this package for myself and I know how much any crafter would appreciate it!