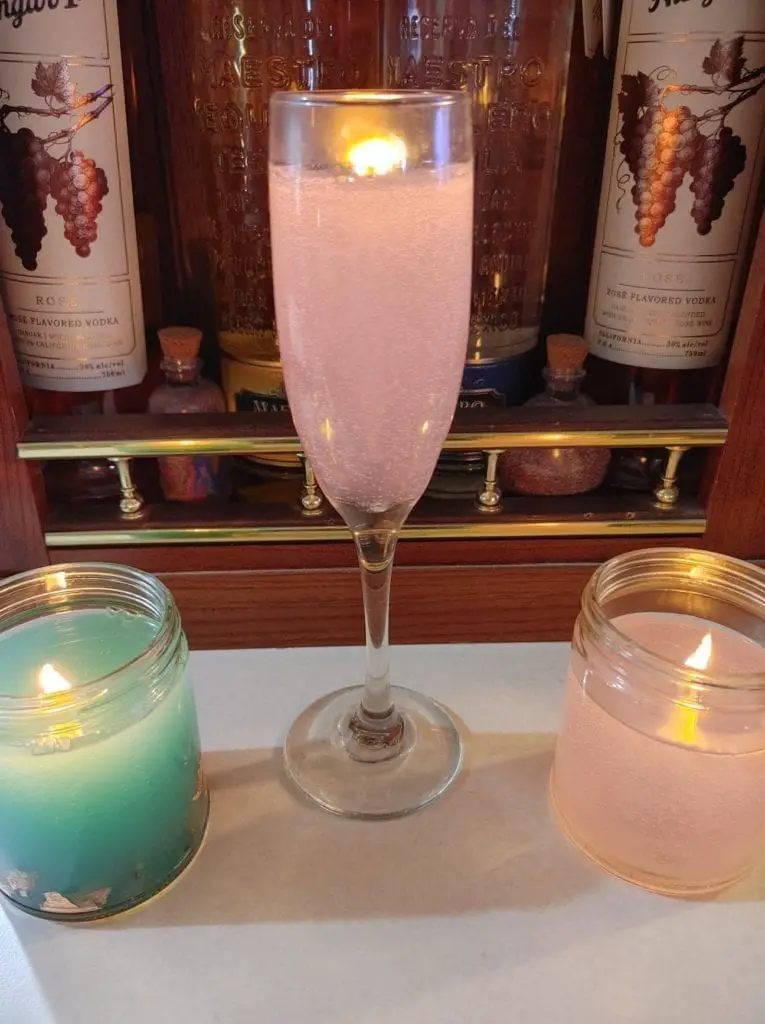
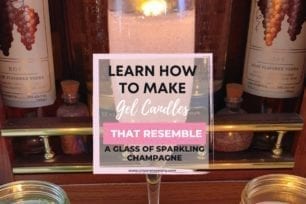
Learn How To Make Gel Candles That Resemble A Glass Of Sparkling Champagne

how to make gel candles

Table of Contents

Here are the things you will need to get started!

  • Glass Champagne Flute(s)
  • Metal Pouring Pot
  • High Density Gel Wax
  • Wick(s)
  • A Wick Fastener (or Clothespin)
  • Colorant (Crayola Crayons/Pigment)
  • Fragrance Oil (If You Want A Scented Gel Candle)

Get A Champagne Flute or Flutes

First, you will of course need a glass champagne flute. You can get these from the Dollar Tree for a dollar a piece or elsewhere online. Refrain from using plastic containers for any candles even if they claim to be heat resistant. They are not fire resistant by any means.

A quick PSA note: Champagne flutes are thin. If you burn a gel candle for an extended period of time it will heat up the gel and the glass quite a bit. For this reason it is wise to only burn a gel candle for a short period of time. They are not meant to be burned for hours unattended. Always practice safe burning of your candles. And, that’s the end of my lovely little PSA. 🙂

Sit your glass on a baking sheet in the oven on warm while you prepare your wax. This will ensure that your glass is ready for the hot wax to be poured into it when the time comes.


Get High Density Gel Wax

Next you will need some high density gel wax. You can snag some on Amazon for a fair price. I will say that gel wax is one of the more pricier waxes. However, most champagne flutes only hold 6-10 ounces so a little can go a long way.

I personally bought a 5 pound bag and have been using it for quite a while. I’ve made several candles from it and I still have plenty left!

Get high density gel wax right now on Amazon.


Get Quality Wicks

(You can use any wick you want, but here is my suggestion.)

Wicks can be tricky to work with and there are a ton of different types of them to choose from.

I have experimented with quite a few wicks with different types of wax. There is one wick that stands out to me as far as performance goes.

That would be the Zinc cored wicks from Lonestar Candle Company. I don’t work with them and am not affiliated with them in any way, but I would promote this wick to the ends of the earth.

This particular wick stays very straight, it burns nicely, and as it burns it does not fall apart or curl into itself like other wicks. It remains very consistent and gives an even burn pool at least 99% of the time. Again, they always say to experiment with wicks, but the Zinc 60-44-18 9 inch wick has worked wonders for me. Here is the link to that product.

Get Zinc Cored Candle Wicks Right Here


How To Make Gel Candles

First, you need a metal pouring pot to heat up your gel wax.

Next, measure the amount of ounces your glass champagne flute will hold. If you are going to add a fragrance I would simply go by the general rule of thumb, 1 ounce of fragrance per pound of wax. I have had no trouble with my candles by using this simple method.

However, if you want to get technical here is a great fragrance load calculator (Don’t worry it opens in a new tab so you won’t lose this page.)

Gel wax heats up much more slowly than other waxes. I recommend heating your wax over medium heat. Heating gel wax on too high of a temperature can cause it to bubble excessively and even turn yellow. You don’t want that.

Once your gel wax is fully melted, remove it from the heat source. Add the fragrance when the wax is between 170 degrees and 180. Stir it slowly but thoroughly into the wax. You don’t want to stir fast because you will create a ton of bubbles.

Coloring Your Gel Wax

Coloring your gel wax is actually very simple. You can add the color right after your fragrance while the gel is still plenty hot.

I personally use Crayola crayons for coloring. It’s easy, cost efficient, and doesn’t require a ton of thinking. For the average champagne flute I simply break off the tip of any color crayon I want and add it to my melted gel wax.

This typically gives me the perfect light transparent drink look I am going for, but is enough to show the color itself.

Stir it in very well until it is fully melted into the wax.

Prepare Your Wick And Pour Your Wax

Get your wick into position with a metal fastener or clothes pin.

Using a metal fastener is the easiest way to center your wick in my opinion. The metal color of your wick should fit perfectly into the bottom of the champagne flute you are using.

Make sure you have plenty of wick at the top of your glass so you are able to fill your glass with wax and not cover it up.

Leave about 1/2 inch to 1 inch of space between your wax and the top of the glass.

Let the gel candle stand about an hour. This should give it plenty of time to solidify.


Trim Your Wick & Light It!

The only thing left to do by this point is to trim your wick. Trim it to about 1/4 inch.

Light your wick and enjoy!

These champagne flute gel candles make great gifts as well and are perfect for holiday table decor.

Now You Know How To Make Gel Candles Of Your Own!

I hope you really enjoyed my tutorial and are able to come up with some dazzling gel candles. Feel free to email or comment about what you’ve come up with. I would love to feature some of my readers in a post in the near future with their own candle designs!

If you enjoyed this post you may like a few of my others!

Easy Homemade Lotion Bars

20 Resin Craft Ideas To Make And Sell

10 Trending Crafts To Make And Sell That Will Earn You Money

13 thoughts on “Learn How To Make Gel Candles That Resemble A Glass Of Sparkling Champagne”

  1. Hey Shyla,

    These gel candles that resemble a glass of sparking champagne look so cute and beautiful! I really liked reading your post and liked the way you given step by step instruction on to make the gel candles. They look so adroable! I better make some for myself. I think you should make a video tutorial and upload it on YouTube.
    Thank you for sharing.

    1. Thank you for reading. I do hope to get my Youtube channel up and running very soon. I will make a post and send out an email about that when it happens. I wish you luck with making your candles!

  2. A great tutorial and also a great idea to make a few for Christmas. I love crafting and has tried many things so far, but I’ve never tried making a gel candle. After this step by step tutorial of yours, I’m already imagining these flutes spread over the house at Christmas time. I think they would look very nice also as a part of a centerpiece for the New Year’s Eve table.
    I think I could start practising with some broader containers, as I’d like to place in those some of the wonderful leaves we have around the house. Do I need to do anything more than cleaning drying the leaves well before placing them into the gel wax?

    1. Honestly you could pre-wax the leaves in beeswax to make them sturdier and position much more easily. Simply use a double broiler to heat up some beeswax and dip the leaves in by the stem. I would use tongs or something similar and then hang them up to dry by a clothespin. I have never added leaves, but this is what I would recommend. 🙂

  3. I really enjoyed this post as I love candles. I’ve never heard of gel candles before and love the way you’ve outlined everything in an easy to understand step by step. They would certainly make perfect gifts for family and friends, and everything required to make them is easy to get online:)

    1. Absolutely! These are so fun and easy and make wonderful gifts for candle lovers and drink enthusiasts. You can make virtually any kind of carbonated drink because gel candles resemble them so well. Get the proper glass container and voilla! Good luck!

  4. Hi Shyla,

    What a great post! I actually have a friend that just started making candles up here in Alaska! I’m going to share this with her so if she wants to vary them up, she can!

    Great information, thanks for sharing this!!

    Katrina

    1. Thank you for reading! I am sure your friend would love to make these candles! They are so easy and a lot of fun. They are usually a big hit!

  5. Hi Shyla ,Thank you for the nice post .I am definitely going to give it a try and see how it goes .I will let you know if something goes wrong.It looks very easy to do after i read you post . Until now ,i thought it was very hard to do .Thank you for clarifying everything .

    1. Candles are so much easier than you would think. I too thought it would be super hard to do, but these are very simple and fun. Let me know how it goes!

  6. Those candles look so neat! I love checking out different DIY projects and candles is something I have wanted to give a try but have yet to dive in yet. This one looks easy for a beginner and the end result is beautiful. I will have to give this a try once I get my hands on the materials needed.

    1. You would really love doing this particular candle. It is quite easy for beginners and would be a great way to step into candle making. I hope you get a chance to try this soon!

  7. Hello Ms. Shyla,

    I just wanted to say how much I really enjoyed your instructions here on making these candles, it was not to wordy and very clear and easy to understand, I appreciate that “down to earth” talk. Also these look beautiful! You did an amazing job. Thank you!

Leave a Comment

Your email address will not be published. Required fields are marked *

This site uses Akismet to reduce spam. Learn how your comment data is processed.

Scroll to Top