
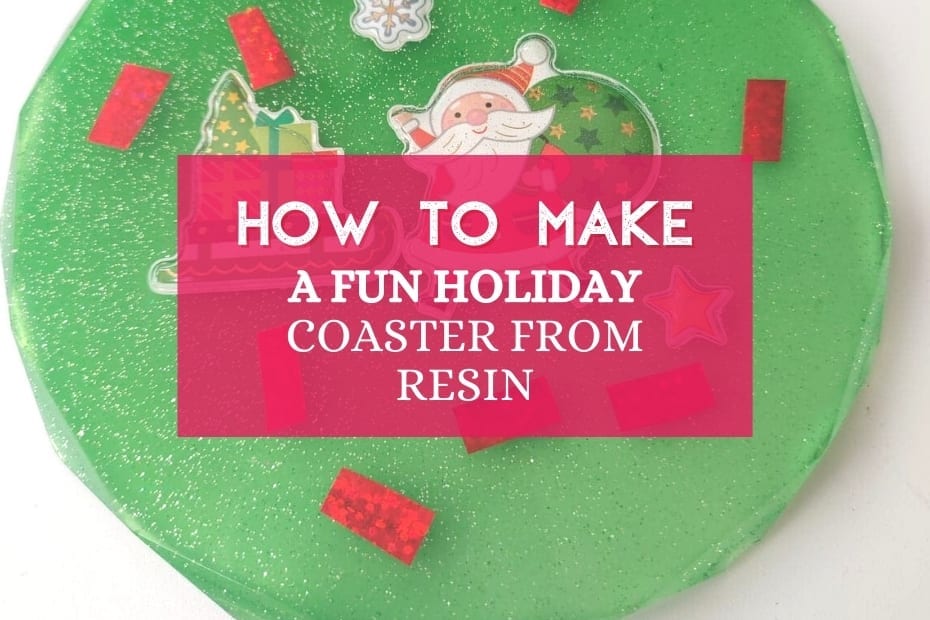
Hey everyone! I’m getting in the holiday spirit at the Sincere Mommy blog. I have been making plenty of crafts and planning fun activities. I had a lot of fun recently making a fun holiday coaster from resin. It was kind of a spur-of-the-moment thing, but it turned out so nice! I want to share it with you and tell you how you can easily make your own.
As an Amazon Associate this post contains affiliate links for which I may be compensated a small amount if you should click and purchase something through them. This is at no extra cost to you.
Materials Needed
- Coaster-shaped silicone mold (such as a diamond round coaster mold)
- Clear epoxy resin
- Silicone brush
- Puffy plastic wall stickers
- Shiny Christmas ribbon
- Crayola kids paint (green with glitter)
- Popsicle stick
- Gloves
- Mixing cups and stirring sticks
- Heat gun (optional, for removing air bubbles)
Steps
- Select Your Mold: Choose a coaster-shaped silicone mold that suits your preferences and fits the holiday theme. You can find a variety of options online, ranging from classic round shapes to intricate designs like the diamond round coaster mold, which features an elegant diamond-like edge.
- Mix Clear Epoxy Resin: Prepare your workspace by ensuring it’s clean and level. Measure and mix clear epoxy resin according to the instructions provided with your resin kit. It’s essential to follow the recommended mixing ratios and instructions for best results. Use a silicone brush to spread the resin evenly within the mold, ensuring complete coverage of the bottom surface.
- Prepare Decorations: Gather your holiday-themed decorations, such as puffy plastic wall stickers and shiny Christmas ribbon. These elements will add charm and character to your coaster. Arrange the stickers face down in the resin layer within the mold, spacing them out evenly to create a balanced composition. Use a popsicle stick to position them as desired, ensuring they adhere well to the resin surface. Cut the ribbon into small pieces, ensuring the shiny side faces down to show on the front of the coaster.
- Allow Initial Cure: Once the decorations are in place, allow the first resin layer to cure for at least a day. While epoxy resin typically cures within 24 hours, it’s essential to follow the specific curing time recommended by your resin manufacturer. During this time, avoid disturbing the mold to ensure the decorations set firmly in the resin.
- Prepare Second Layer: After the initial resin layer has cured, prepare the second layer of resin mixed with Crayola kids paint. Choose a festive color that complements your holiday theme, such as green with glitter for a Christmas-inspired look. Mix the paint thoroughly into the resin until the desired color and consistency are achieved. Pour the colored resin into the mold, covering the decorated surface evenly.
- Remove Air Bubbles (Optional): To ensure a smooth and bubble-free finish, use a heat gun to gently pass over the surface of the resin. The heat helps to release any trapped air bubbles, allowing them to rise to the surface and dissipate. Be cautious not to overheat the resin or hold the heat gun too close to avoid damaging the decorations or causing the resin to overheat.
- Allow Final Cure: Once the second resin layer is poured, allow the coaster to cure for another day or as recommended by the resin manufacturer. During this time, ensure the coaster remains undisturbed to prevent any imperfections from forming. Monitor the curing process to ensure the resin hardens properly and achieves a glossy finish.
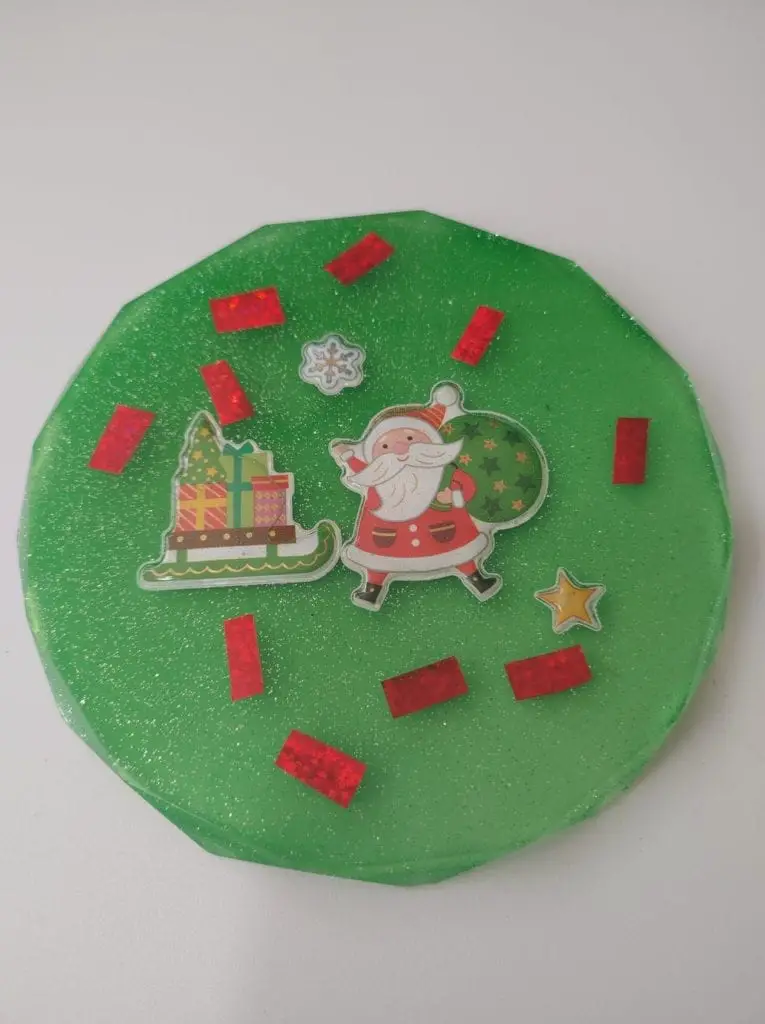
- Demold Your Coaster: After the final curing period, carefully demold your coaster from the silicone mold. Take your time and gently flex the mold to release the coaster without causing any damage. Admire the vibrant colors and festive decorations captured within the resin. The puffy stickers and ribbon should be prominently displayed against the colored resin background, creating a visually appealing holiday coaster.
I definitely will be making more of these in the future with different stickers and colors. You could even make an ornament by using a smaller mold and simple drilling a hole at the top. Add a hook and voilla!
Feel free to show me your creations and send them to [email protected] for a chance to be featured on the website.