
This dynamic duo is truly a match made in heaven! You probably know that resin can be used to make a ton of mind-blowing crafts. Imagine combining the incredible properties of resin with the brilliant cutting works of a Cricut! The results are fantastic, and these projects typically sell much better than their stand-alone counterparts. Allow me to show you how to use resin with your Cricut projects!
As an Amazon Associate this post contains affiliate links. I may be compensated a small amount if you should click and purchase something through them. This is at no extra cost to you whatsoever.
Table of Contents
Create Your Resin Art
- Choose Your Resin Art Project:
- Select the type of resin art project you want to create, such as coasters, keychains, trays, or any other desired item.
- Consider your skill level and familiarity with resin before diving into more complex projects.
- Prepare Your Workspace:
- Set up a clean and well-ventilated workspace to ensure optimal conditions for working with resin.
- Gather all necessary materials and tools, including resin, hardener, molds, mixing containers, and any desired embellishments.
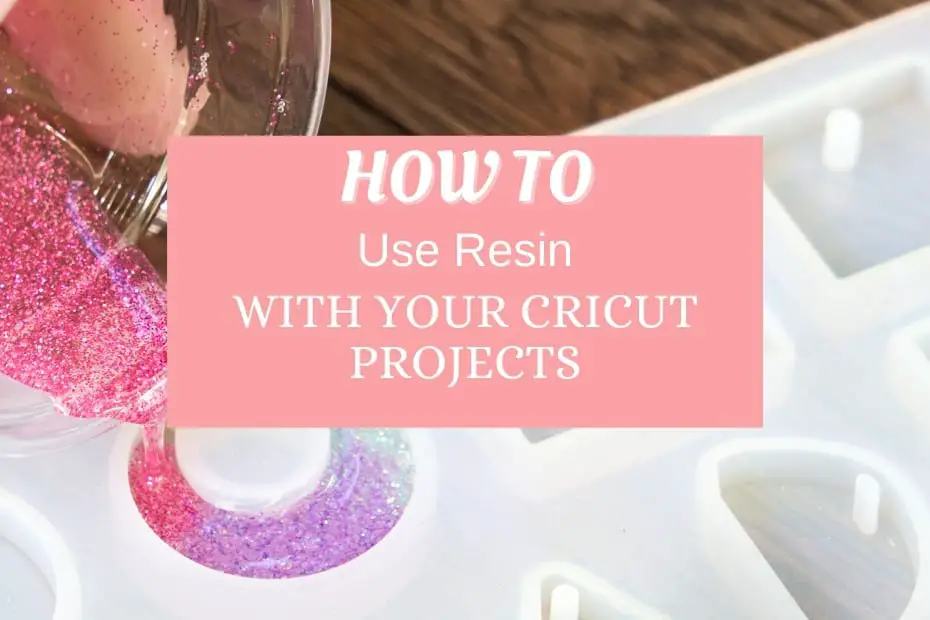
- Mix and Pour Resin:
- Follow the manufacturer’s instructions for mixing the resin and hardener in the appropriate ratio.
- Pour the resin mixture into your chosen molds, taking care to avoid air bubbles and ensure even distribution.
- Customize Your Resin Art Piece:
- While the resin is still liquid, add any desired embellishments or inclusions to personalize your piece.
- Experiment with different techniques, such as layering colors or embedding objects, to achieve unique effects.
- Allow Resin to Cure:
- Place your resin art piece in a dust-free area and allow it to cure according to the manufacturer’s recommendations.
- Be patient during the curing process, as rushing can lead to imperfections in your final piece.
Design Your Cricut Cutout
- Choose Your Design:
- Decide on the design or image you want to incorporate into your resin art piece using your Cricut machine.
- Consider the size and placement of the design relative to your resin art project.
- Select Materials:
- Opt for vinyl material for your Cricut cutout, as it provides flexibility and durability.
- Ensure that the vinyl material is compatible with your Cricut machine and cutting settings.
- Design and Cut:
- Use Cricut Design Space to create or upload your desired design, adjusting the size and orientation as needed.
- Follow the prompts to load the vinyl material into your Cricut machine and begin cutting.
- Weed and Transfer:
- Carefully weed away the excess vinyl material using a weeding tool, leaving only your desired design intact.
- Use transfer tape to transfer the cutout onto your resin art piece, ensuring precise placement and adhesion.
- Seal the Vinyl:
- Seal the vinyl cutout with a clear sealant or resin topcoat to ensure optimal adhesion to the resin surface.
- Allow the sealant to dry completely before handling or displaying your finished resin art piece.
By following these steps, you can seamlessly integ
If you don’t have a Cricut, you can get one at many craft stores, on Amazon, or directly from Cricut.
How To Design Tumblers With Resin and Cricut Designs
Materials Needed:
- Vinyl decal
- Tumbler
- Alcohol wipes
- Resin
- Cup turner
Steps:
- Prepare the Tumbler:
- Ensure the tumbler is clean and dry before applying the vinyl decal.
- Use alcohol wipes to clean the surface and thoroughly remove any impurities affecting adhesion.
- Apply the Vinyl Decal:
- Carefully position the vinyl decal on the tumbler, ensuring it is aligned and centered as desired.
- Press down firmly to adhere the vinyl to the tumbler’s surface, smoothing out any air bubbles or wrinkles.
- Secure the Tumbler:
- To prevent the resin from dripping and pooling unevenly, it’s essential to secure the tumbler horizontally during the application process.
- Invest in a rotating cup turner to keep the tumbler moving while the resin is applied and dried, ensuring even coverage.
- Mix and Apply Resin:
- Follow the manufacturer’s instructions for mixing the resin and hardener in the correct ratio.
- Pour the resin mixture evenly over the tumbler’s surface, starting from the top and allowing it to flow down naturally.
- Allow to Cure:
- Once the resin is applied, place the tumbler on the cup turner and allow it to rotate for the duration of the curing process.
- Follow the recommended curing time provided by the resin manufacturer, ensuring the tumbler remains undisturbed during this time.
- Final Touches:
- After the resin has fully cured, remove the tumbler from the cup turner and inspect for any imperfections.
- Use sandpaper or a polishing compound to smooth out any rough edges or uneven surfaces if necessary.
Here is an amazing tutorial on making glitter vinyl tumblers using a tumbler turner and epoxy resin.
Applying Vinyl To Different Resin Crafts
- Position the Vinyl:
- Carefully place the vinyl cutout onto the surface of your resin piece, ensuring it is centered and aligned as desired.
- Press down firmly to adhere the vinyl to the resin, smoothing out any air bubbles or wrinkles.
- Prepare for Top Coat:
- Once the vinyl is in position, prepare to apply a top coat of resin to seal it in place and provide a smooth finish.
- Ensure the work area is clean and free from dust or debris that could affect the final result.
- Apply Top Coat of Resin:
- Mix the resin and hardener according to the manufacturer’s instructions, ensuring proper ratio and thorough mixing.
- Pour the resin mixture evenly over the surface of the resin piece, covering the vinyl cutout completely.
- Spread and Level:
- Use a clean stirring stick or brush to spread the resin evenly over the surface, ensuring the vinyl cutout is fully coated.
- Pay attention to any edges or corners to ensure thorough coverage.
- Address Small or Oddly Shaped Projects:
- Tray or Deep Dish Type Project:
- Apply the vinyl directly to the blank tray or dish, positioning it as desired.
- Coat the entire surface, including the vinyl, with epoxy resin.
- The natural dip of the tray or dish will prevent resin from dripping down the sides.
- Small or Irregularly Shaped Project:
- Use masking tape or painter’s tape to create a barrier around the edges of the vinyl cutout.
- Apply a thin resin layer over the vinyl using a brush or stirring stick to ensure even coverage.
- Monitor the resin as it cures to prevent drips or uneven pooling.
- Tray or Deep Dish Type Project:
- Allow to Cure:
- Once the top coat of resin is applied, allow the resin piece to cure according to the manufacturer’s instructions.
- Ensure the piece is placed on a level surface and remains undisturbed during curing.
Here is a great video example
Here are some common methods for applying vinyl to other resin projects!
- Leave Charm in Mold:
- Keep the charm in the mold during the vinyl application process.
- Pour resin into the keychain mold, filling it only a small portion of the way to create a flat surface.
- Allow the resin to fully dry before proceeding.
- Apply Vinyl:
- Once the resin is dry, apply the vinyl decal to the flat surface of the charm.
- Press down firmly to ensure proper adhesion.
- Add Top Coat of Resin:
- Apply another coat of resin over the vinyl decal to seal it in place.
- The small size of the mold helps prevent drippage down the sides.
Round or Square Coaster Projects:
- Apply Vinyl Decal:
- Position the vinyl decal onto the coaster project, ensuring it is centered and aligned.
- Press down firmly to adhere the vinyl to the surface.
- Tape Around the Project:
- Use crafter tape to create a barrier around the edges of the coaster, ensuring a clean finish.
- Optionally, prop the coaster up on a dixie cup to elevate it slightly from the work surface.
- Pour Top Coat of Resin:
- Once the coaster is taped and elevated, pour a top coat of resin over the vinyl decal.
- Ensure the resin is spread evenly and covers the entire surface of the coaster.
- Optional:
- Taping around the project helps prevent resin from flowing over the edges and creating drips.
- It also helps create a clean, crisp edge around the coaster design.
By following these steps, you can effectively apply vinyl decals to small keychain or necklace charms and round or square coaster projects, sealing them in place with a top coat of resin. These techniques ensure professional-looking results while minimizing the risk of drippage or uneven surfaces.
I hope you enjoyed this post and found it helpful!
Feel free to email any creations you’ve made to [email protected]!