
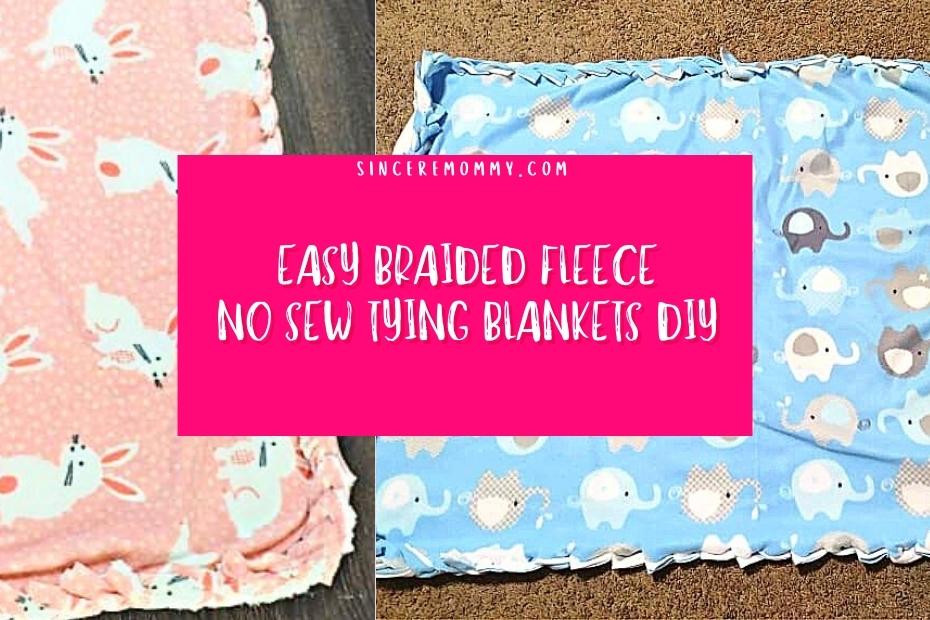
I absolutely love this DIY for so many reasons and I am really excited to share it with you today. I have never been a masterful seamstress, but have always dreamed of making nice things with fabric. When I learned how to make these easy braided fleece no sew tying blankets everyone was impressed. They look very professional, are durable, and are so comfortable! Let’s jump right in to this lovely little project!
* As an Amazon Associate this post contains affiliate links. This means I may be compensated a small amount if you should click and purchase something through them. This is at no extra cost to you.
Table of Contents
Materials You Will Need To Get Started
- 2 yards of fleece.
- Fabric shears/scissors.
- Measuring tape (for more precision).
- Masking tape.
This braided fleece no sew tying blanket DIY project is extremely easy so I’m not going to beat around the bush to make it seem more complex than necessary. No one likes to be bombarded with unnecessary information.
The key point of importance for this project is to make sure that you have a big enough space to lay out your fleece.
Then you will want to make sure that surface is protected from being damaged or cut.
In my particular case I used my kitchen floor as it was the only hard surface large enough to lay out my fleece fabric and cut it.
(PSA: Do not do this project on a floor that you could easily damage. I do not recommend putting it on a wood floor or anything that is expensive. Take all precautions to prevent cuts in your floor. If you are blessed enough to have a large craft table to work on, I envy you!)
The First Steps
Lay your base yard of fleece on the floor and spread it out entirely. Make sure that the side of the fleece you want to show on the bottom of the blanket is face down on the floor.
I’d hate for you to finish your project and realize the dull side of your fleece is showing. Some fleece is the same on both sides while others are not.
Please double check!
(I feel like I’m being bossy. Am I being bossy?)
Next, lay your top piece of fleece over the bottom piece with the pretty/colorful side facing up.
Time To Do Some Cutting
Now don’t stress about this part. You can use measuring tape to get the dimensions you want for your blanket. There is a lot of room for error in this project, so nothing has to be perfect.
The yards of fabric will likely be a bit sloppy around the edges and probably not evenly laying corner to corner.
What I like to do is use a simple measuring tape along the edges to get the dimensions I want and then use masking tape to mark my cut lines.
Once you’ve taped the edges you can begin cutting to square up the soon to be blanket. Once your blanket is nice and evenly layered you can cut out a square from each corner.
Cut Some Fringes
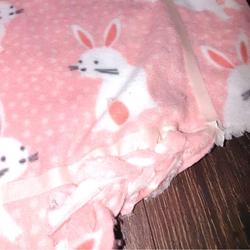
This part is a bit tedious, but you’ll be proud of yourself when you have a finished blanket. Cut around all of the edges about 1-inch-wide strips. 2 1/2 inches in length.
You can eyeball this step for the most part.
Then you can either fold the fringes in half and make a half inch cut in them or use a rotary blade to make cuts in each fringe.
Be sure not to cut into your floor or workspace! Lay a board or cutting mat underneath your project if you have one.
Unlike a traditional tying blanket, you will be using the holes in the fringes to link the blanket together.
Linking The Fringes
The reason this project is called the braided fleece no sew tying blanket is because instead of tying knots you will be chain linking the fringes you cut into a braid.
This means no uncomfortable knots and there is only one tie and it is at the very end.
Since you have holes cut in every fringe (through both layers), you will begin to place one set of fringes over the next.
Start at the very corner of your blanket next to the square that has been cut out.
Continue around the blanket running each fringe through the one next to it.
Go completely around the entire blanket.
Tie Off the Blanket
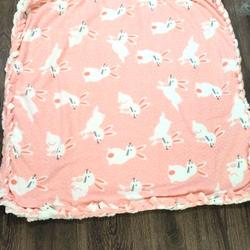
Once you have linked every set of fringes together you can tie the last one together. A simple knot will do the trick.
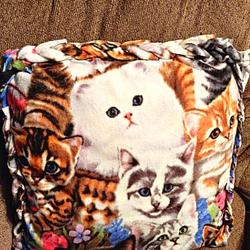
The blanket will stay together extremely well, and you will not have to worry about it coming apart. I have done several of these blankets and even a pillow!
I have to say it is probably my favorite no sew project.
The final product should look something like this!
A Few Of My Other Finished Products
This is an elephant blanket I made for my son as well as a kitty cat throw pillow.

Don’t Wait to Get Started!
These blankets make amazing gifts for anyone. Give them at baby showers, birthdays, or any upcoming holiday.
The beauty of this project is that it looks super professional yet doesn’t take a ton of tedious work!
