
Because my soy candle tins have been in such high demand at my Etsy shop in recent weeks, I am going to show you exactly how I make them. They are very easy to make, and they are so splendid and charming to look at. They really will liven up just about any room. Let’s begin!
*As an Amazon associate, this post contains affiliate links for which I may be compensated a small amount if you choose to click and purchase something through them. This is at absolutely no extra cost to you.
Table of Contents
Find A Set Of Pretty Tin Containers
I happened to stumble upon some beautiful candle tins while browsing through Amazon. Finding candle tins on Amazon is as easy as a few clicks of your mouse or taps on your phone screen. With a vast selection of options available, you can explore an array of sizes, shapes, and designs to suit your candle-making needs.
Supplies Needed:
Before diving into the magical world of candle-making, ensure you have all the necessary supplies at your fingertips:
- Soy Wax: Opt for high-quality soy wax for clean, eco-friendly burns.
- Candle Tins: Choose from an assortment of charming tins to house your creations.
- Fragrance Oil: Select your favorite scents to infuse your candles with aromatic bliss.
- Liquid Color: Add a splash of color with liquid colorants or crayons.
- Wick: Ensure a steady flame with braided cotton wicks or crackling wood wicks.
- Metal Fasteners: Keep wicks securely anchored within the tins.
- Heat-Resistant Measuring Cup: Essential for melting wax safely.
- Pan: Create a double boiler setup to melt wax evenly.
- Candy Thermometer: Monitor wax temperature for optimal fragrance and color addition.
- Paintbrush: Blend fragrance oil and colorant into the molten wax.
- Metal Spoon: Pour molten wax into tins with precision.
- Trimmed Dowel or Stick: Keep wicks centered while pouring wax.
- Sealing Materials: Preserve your creations with clear sealants or varnishes.
- Scissors: Trim wicks to ensure a clean burn.
- Safety Gear: Protect hands and eyes with heat-resistant gloves and goggles.
Preparing Soy Wax – Setting the Stage for Candle-Making Magic
- Measure out the required amount of soy wax, ensuring double the volume of your chosen tins.
- Place soy wax in a heat-resistant measuring cup and set it in a pan filled with water.
- Heat the water gently until the wax melts, stirring occasionally for even melting.
Melting the Wax: – Solid Transforms to Liquid
- Monitor wax temperature with a candy thermometer, aiming for 180-185°F.
- Once melted, remove from heat and prepare for fragrance and color addition.
Wick Preparation: Anchoring Your Candle’s Lifeline
- Secure wicks in the center of each tin using metal fasteners.
- Ensure wicks are straight and taut to facilitate an even burn.
Adding Fragrance and Color: Infusing Your Creations with Personality
- When wax cools to around 185°F, add fragrance oil and liquid colorant.
- Stir gently but thoroughly to distribute fragrance and color evenly throughout the wax.
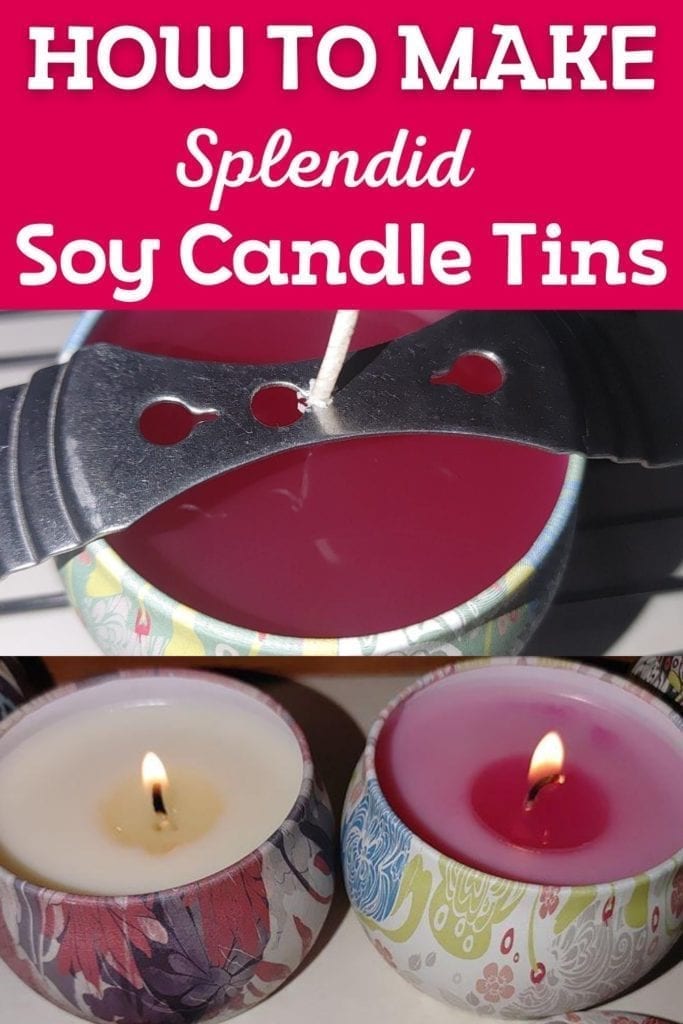
Pouring the Wax: Giving Shape to Your Candle’s Destiny
- Carefully pour melted wax into each tin, filling them to the brim.
- Take care to avoid spills and ensure a smooth, even distribution of wax.
Allowing to Harden: Patience is a Virtue in the World of Candle-Making
- Let candles cool and harden for at least an hour.
- Once set, remove metal fasteners and trim wicks to ¼ inch.
Lighting the Candle
- With a flick of the match, ignite the wick and behold the warm, flickering glow.
- Enjoy the delightful aroma of your creation as it fills the room with fragrance and ambiance.
Let me know how your soy candle tin making endeavors turn out! Remember to stay happy, healthy, and crafty!
and….