
Saint Patrick’s Day is a holiday that is sometimes overlooked. Although when you’re crafty you look for any excuse to make something fun for each and every holiday. My crafty sister actually came up with this idea and I really love it. The craft I have for you today is simple and only takes a few supplies. Let’s get started with a really fun and super cute St Patrick’s Day kids craft.
*As an Amazon Associate this post contains affiliate links for which I may be compensated a small amount if you should click and purchase through them. This is at no extra cost to you.
Table of Contents
Supplies You Will Need
These are all relatively common and inexpensive craft items you can pickup at most local craft or shopping center. You can also order them online of course.
- Large Paper Plate
- Orange Paint or Orange Marker
- Construction Paper (Green, Pink, Dark Pink, Yellow, And Black)
- Googly Eyes
- Scissors
- Glue
- Ruler
- Pencil
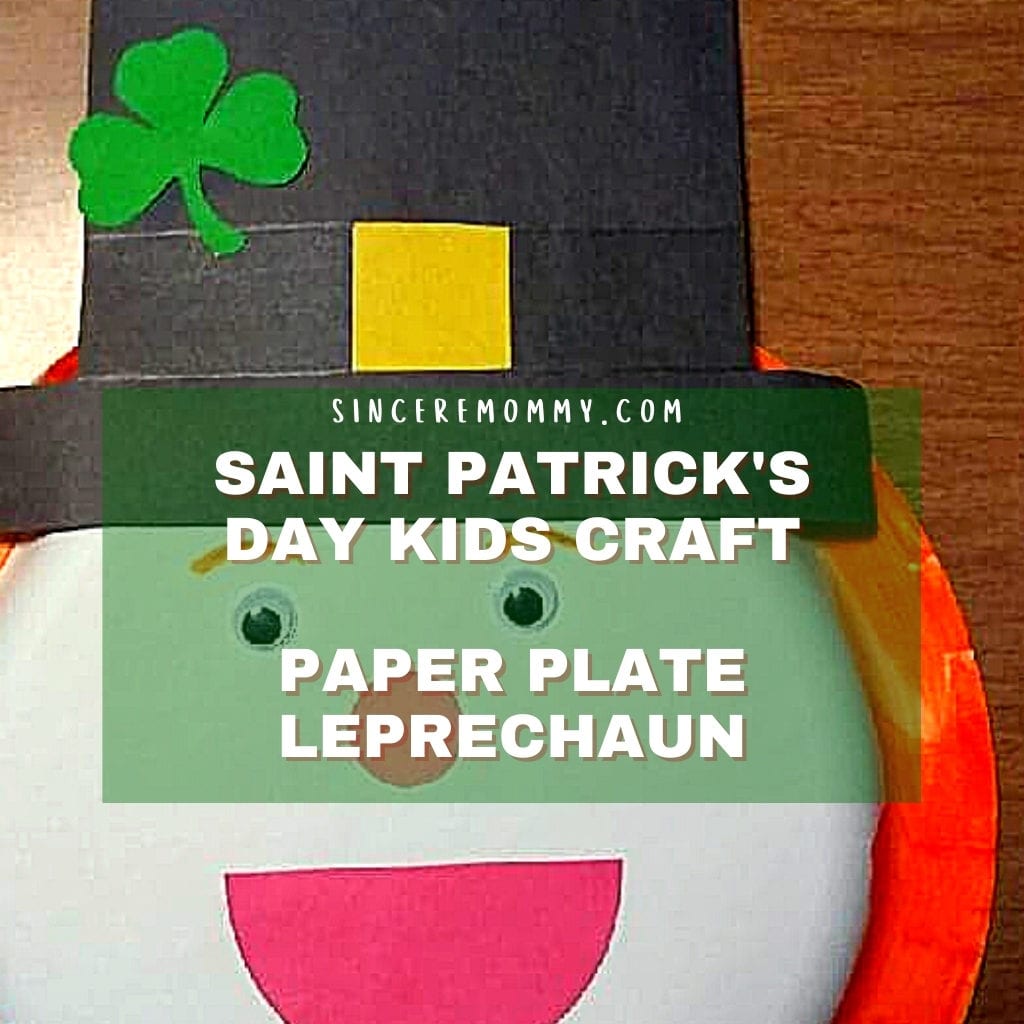
This craft is of course open to interpretation just like any other. You can do your own spin and get as creative as you like. I will be showing you step by step how to make a very basic yet adorable St Patrick’s Day paper plate leprechaun. These are perfect to hang up in the home or classroom.
First Paint Or Color Your Paper Plate
This step is very easy and fun. Kids usually love the painting part. All you have to do is take your large paper plate and flip it upside down. Paint around the outer edge with orange paint for the leprechauns beard/hair.
Marker or crayon could work as well.
Gather Your Construction Paper
Each color will serve its own purpose and there will be plenty of leftover paper to make more leprechauns with.
Black Construction Paper: Draw a leprechaun hat. Start by making a long rectangle that is about 2 inches wide. A ruler may help with this step. On top of that rectangle you can make another one only shorter by a few inches.
Then simply draw a square shape on top of the small rectangle for the top of the hat. You can use the image for reference. It’s much more simple than it sounds.
Dark Pink Construction Paper: This color will be for the mouth. The easiest way to get the mouth shape is by drawing a half circle.
You can actually make two mouths easily by drawing a circle and making a line through the center of it. Simply cut them apart and keep the extra.
Light Pink Construction Paper: The nose is a very simple small circle. Free hand draw it or trace a round object such as a lid or cap.
Yellow Construction Paper: This color is for the hate buckle. All you need to draw is a small square. Try to make sure it is the correct width for your hat.
Green Construction Paper: Draw a shamrock shape
Cut out and glue on your paper pieces.
Once all of your pieces are cut out and your paper plate is dry you can start to assemble everything.
First, glue your black hat on the top of the plate. Make sure you use plenty of glue, but not too much. Press it down firmly so that it sticks well. Everything else should be quite easy to figure out.
Next, glue on your circle nose in the center of the plate. Leave room for the eyes.
Add the mouth under the nose and the yellow buckle to the strap of the hat.
Finally, glue on your shamrock for a lovely touch.
The Last Steps Of Your St Patrick’s Day Kids Craft
All that is left now is to glue on those silly googly eyes that kids love so much. If you like you can draw an orange eyebrow over the eyes.
Now the paper plate leprechaun should be completely finished and ready to hang up! It makes a cool door hanger or even something nice to stick on a cork board at school.
You can experiment with different nose or mouth shapes for some humorous fun. I’ve even considered adding orange yarn for hair. The sky is the limit with crafts as you know.
I hope you enjoyed this St Patrick’s Day craft!
I would love to see the leprechauns you come up with. Feel free to email them over to [email protected] for a chance to be featured on the website!
Happy crafting!