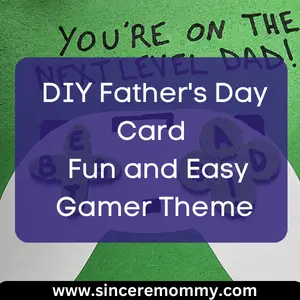
The modern-day dad might be a bit more into technology and gaming. That’s why I created this super cute DIY Father’s Day card with a cool gamer theme aesthetic. This card is pretty simple and doesn’t require many supplies, although if you have a Cricut cutting machine, it could expedite the process.
*This post contains affiliate links. As an affiliate of Amazon, I may receive an amount if you should click and purchase something through one of the links provided. This is at no extra cost to you.*
Table of Contents
What you will need to get started
- 12×12 Cardstock. Whatever your choice of color, I chose green as it felt more gamer-y. I don’t think that’s a word, but it sounds good.
- Adhesive Foam Sheets. Again I chose green, but you can pick whatever color you like. I bought a multipack with several color options.
- Black Sharpie Marker
- White Adhesive Vinyl.
- X-acto Knife or Cricut Machine
You probably could substitute a few of these craft supplies, but to achieve the look that I created, you may want to stick to these similar supplies.
Steps to Create DIY Father’s Day Card
Follow these steps to create the DIY Father’s Day card. These steps are general guidelines for creating a card similar to what I’ve made as possible. Like any craft, you can be as creative as you want and use your interpretation.
Step #1 – Cut and Fold Card Stock.
This step is pretty straightforward. All you need to do is cut the 12×12 inch cardstock in half, then fold it. Once folded, the card stock should be about 6 inches in height.
Step #2 – Cut Out the Controller Image
For this step, you can use a Cricut machine or any cutting machine to cut out a blank video game controller image. If you are free handing the drawing, you can use an X-acto knife to cut out the vinyl sticker or even scissors.
If you aren’t the best at drawing, you can most likely print out an image of a controller from online and trace it onto the vinyl with the black Sharpie and then cut it out that way.
Trust me, the day I bought a Cricut for my crafting was when I truly began to live. Okay, slight exaggeration, but Cricut cutting machines are pretty fantastic.
Step #3 – Cut Out Controller Buttons
Cut out buttons for the controller from the foam. For this, I was thrilled to have a Cricut, but I did do some of my buttons with an X-acto because the depth setting on my Cricut was slightly off. You can easily trace anything with a small circle to outline the buttons. Simply cut them out with scissors or an X-acto.
You might even find sticker sheets that sell circular foam stickers if you’re lucky. However you have to do it, ensure you create four circles about 1/2 inch in diameter.
Step #4 – Cut Out Directional Pad Buttons
Cut the directional pad buttons into a plus sign shape. You will also want each point of the plus sign shape to be about 1/2 inch in diameter.
Step #5 – Write Best Dad! on the Buttons
Write a nice message on your DIY Father’s Day card using the buttons of the controller. For my buttons, I wrote Best Dad! Using black Sharpie.
You can switch this up if you come up with something more clever but this is all that I could think of that fit well.
Final Touches
For the final touch to your DIY Father’s Day card, add your designs with the Sharpie marker to incorporate any additional features that a video game controller would have.
I used the black Sharpie to draw a few extra buttons and color the bumper buttons on the left and right.
Write your message!
For the message on the front of the card, I wrote, “You’re on the next level Dad!” for a clever gamer pun Dad joke.
Whatever you want to write on the inside is totally optional and up to you. I encourage you to write something heartfelt and meaningful this Father’s Day.
If your dad loves gaming, he is sure to love this DIY Father’s Day card and the message you choose to give him.

If you liked this post you may also like to check out my list of 10 more Father’s Day Card Crafts!

